The full Qoin registration process involves 8 steps:
As a new Qoin Merchant, your Agent will also be able to assist you to complete Steps 1-5 of the registration process below.
Step 1 – Download the Qoin Wallet App on your Mobile Phone
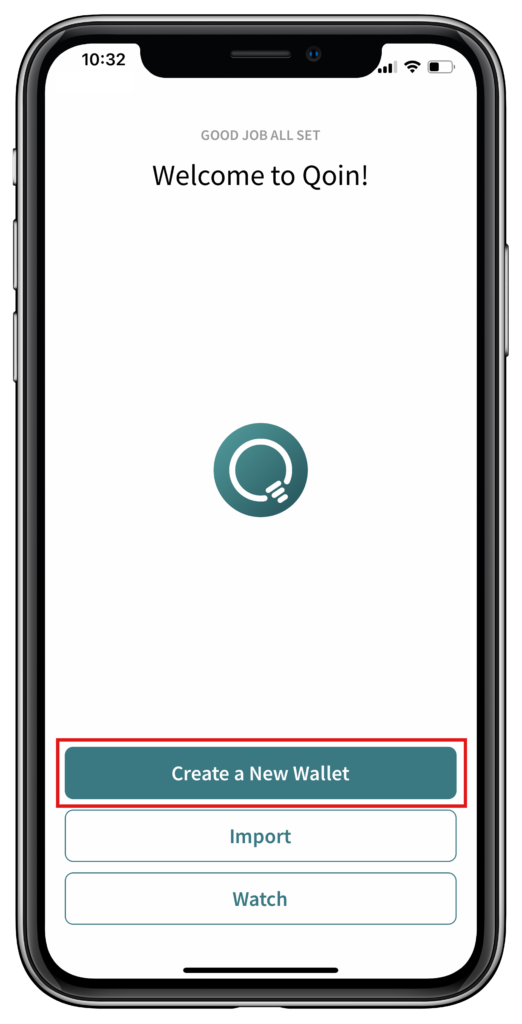
Download the Qoin Wallet App from the Apple or Google Play Store and click ‘Create a new wallet’ to get started.
To download the iOS wallet app (Apple)
1. Go to the App Store
2. In the search bar, type in ‘Qoin Wallet’ & tap ‘Search’ on your keyboard
3. Scroll until you find Qoin Wallet & tap on the download icon
4. Once the download is complete, tap ‘Open’ to open the Qoin Wallet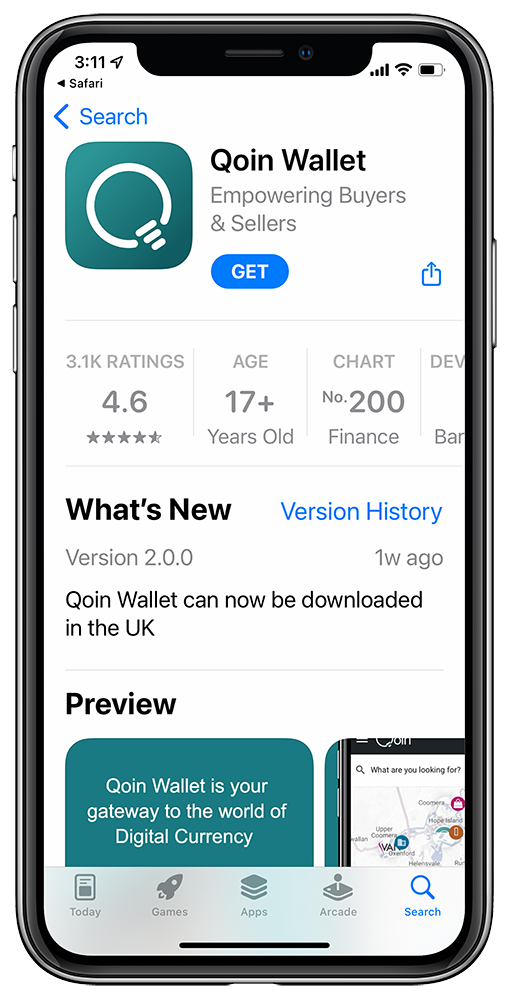
To download the Android wallet app
1. Go to the Google Play Store
2. In the search bar, type in ‘Qoin Wallet’ & tap ‘Search’ on your keyboard
3. Scroll until you find Qoin Wallet and tap on it
4. Once the installation is complete, tap on ‘Open’.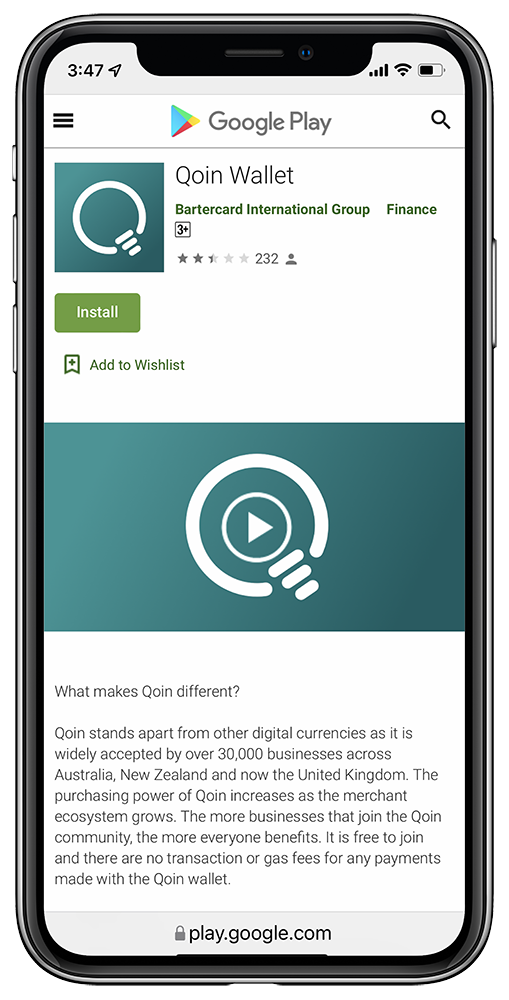
Step 2 – Register & KYC
Register
After downloading the wallet app, you must complete the following information to register:
1. On the ‘Sign Up’ screen: Enter your email address and create a password
2. Set your Location: Select your country, E.g., Australia
3. Confirm your email address. Go to your email account and check your email for a confirmation link. Tap the button in the email to confirm.
4. Your email address has been verified. Once you have confirmed your email address this will be displayed as verified.
5. Enter your mobile number and select the option to agree to receive a verification SMS
6. Enter the 6-digit verification number, once you have received this via SMS
7. Read and agree to the Financial Services Guide and Product Disclosure Statement, Terms of Use, and the Privacy Policy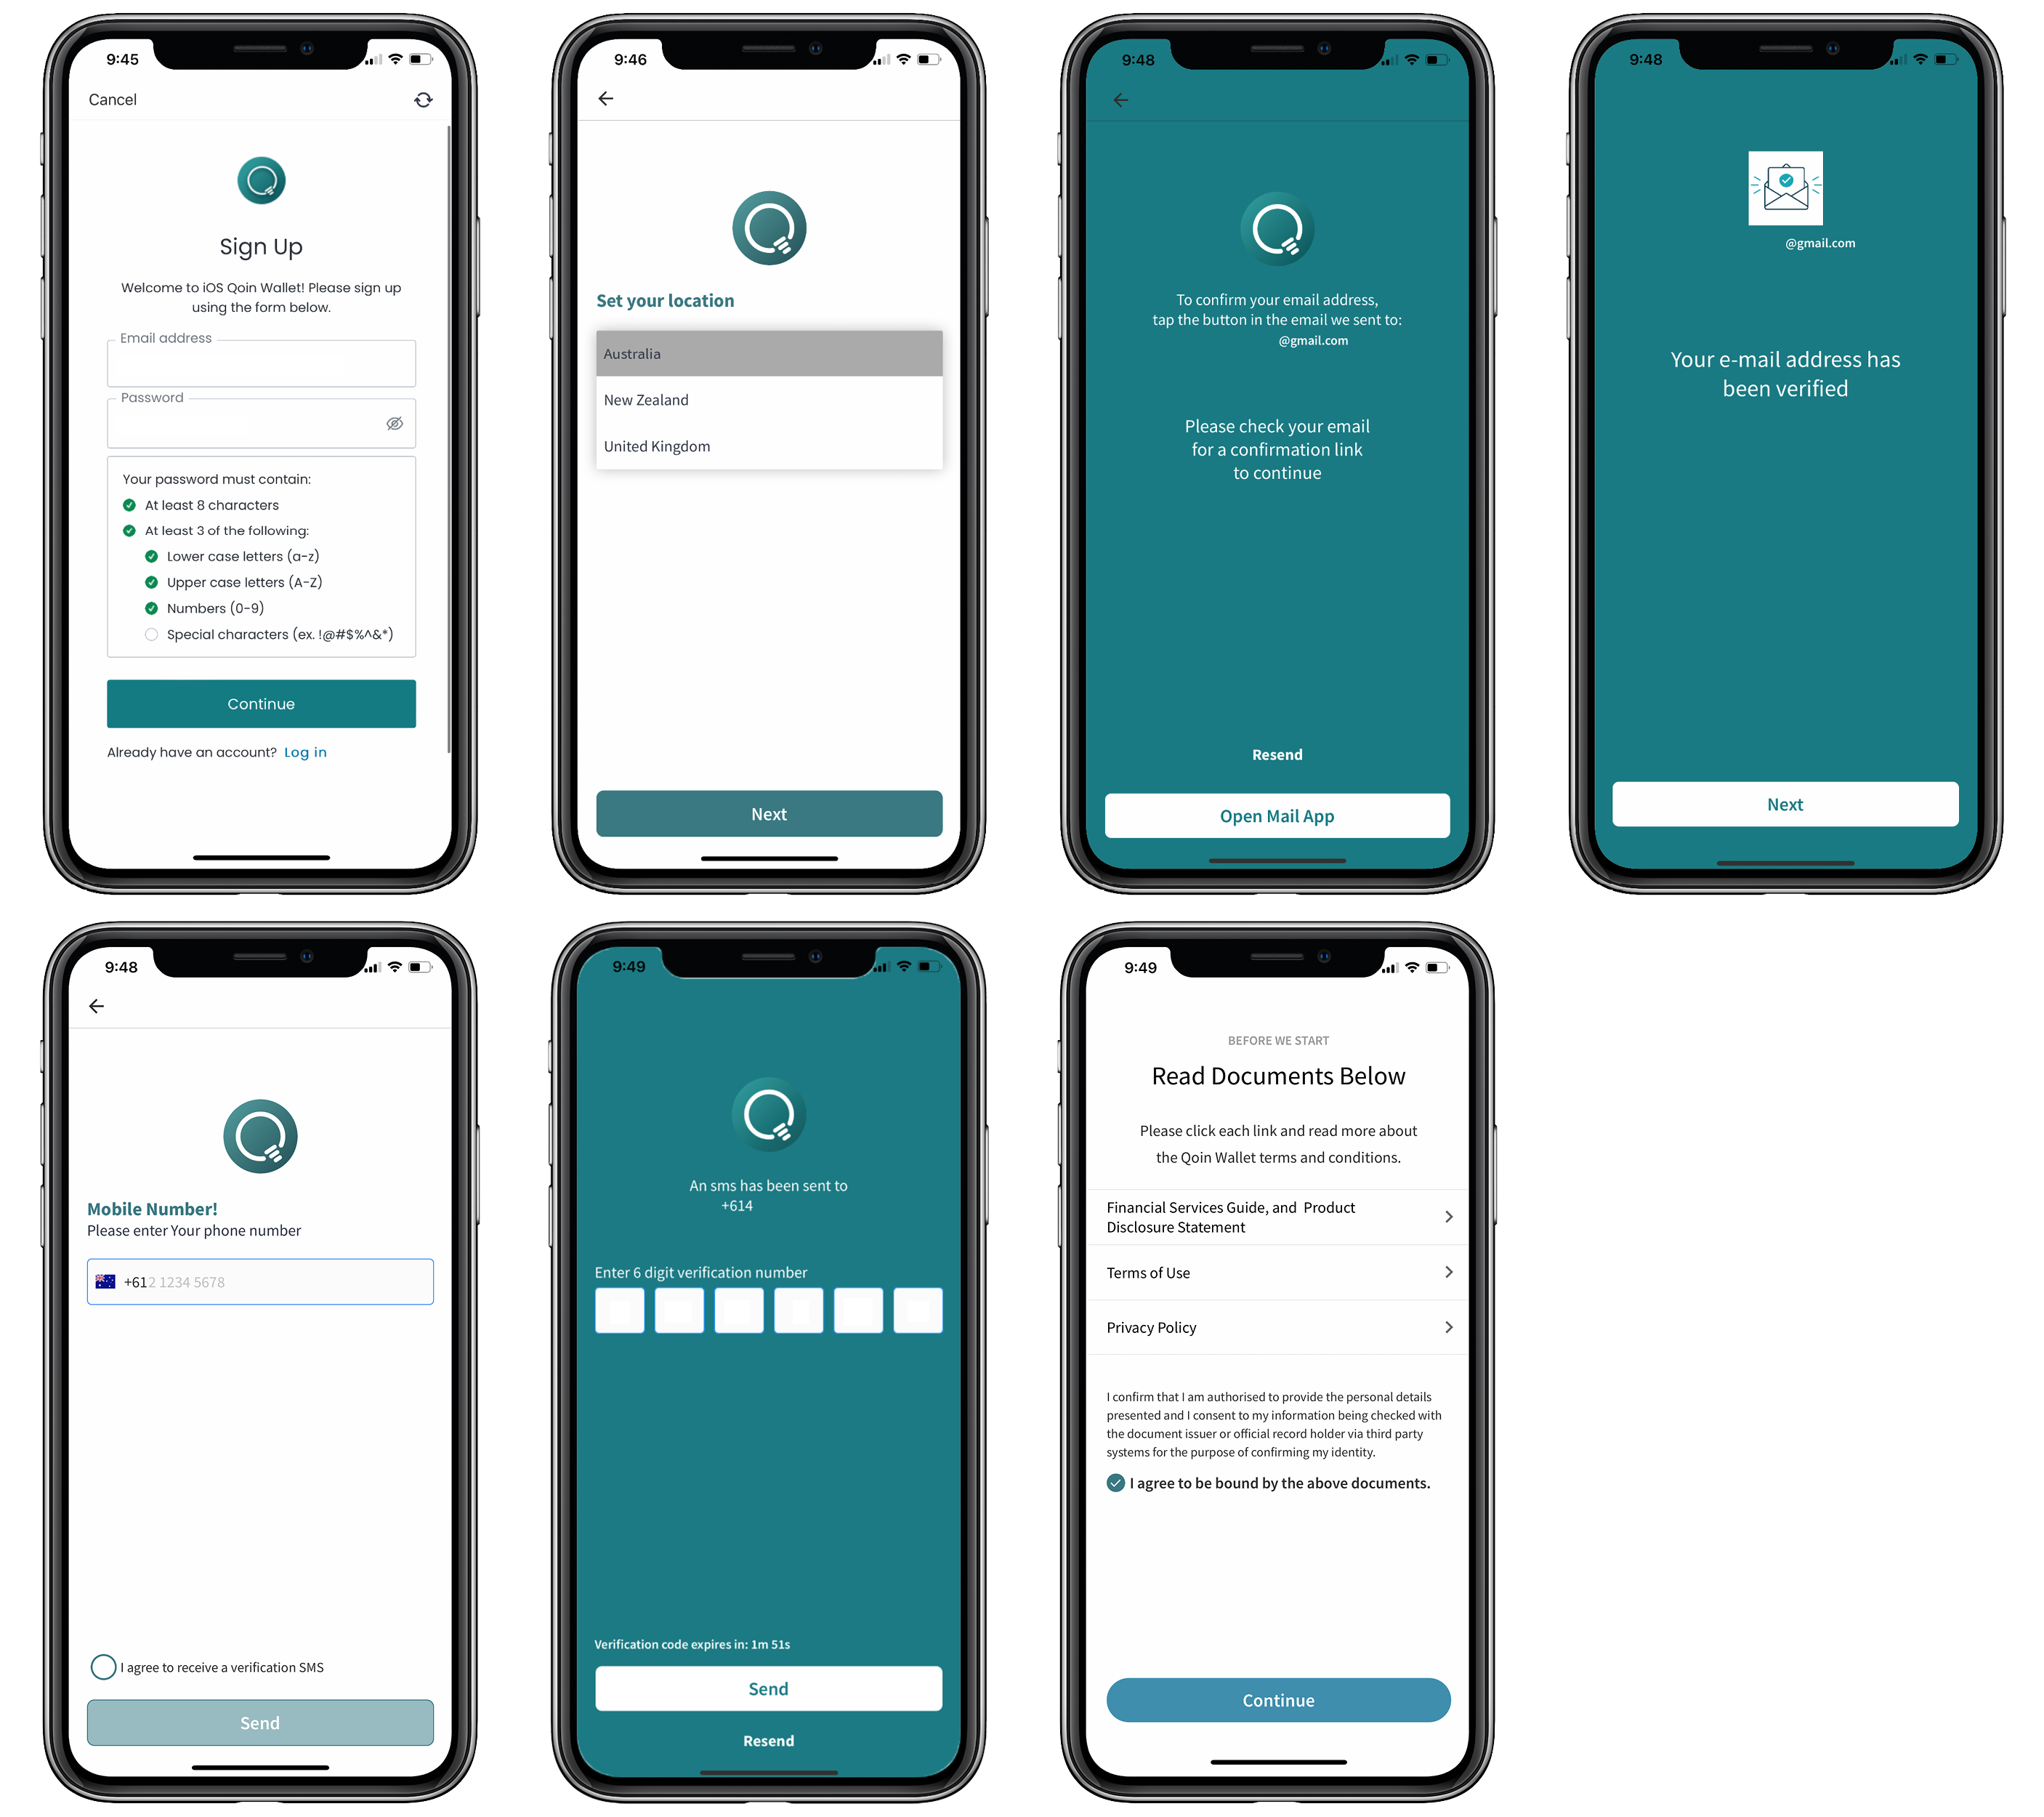
Know Your Customer (KYC)
PLEASE NOTE: Once you have registered you will not be able to access your wallet until you have completed Know Your Customer (KYC).
Know Your Customer (KYC) is a mandatory process to identify and verify the identity of a client. In other words, Qoin must make sure that all Merchants are genuinely who they claim to be when becoming a Qoin Merchant.
Once you have registered and agreed to the Financial Services Guide and Product Disclosure Statement, Terms of Use, and the Privacy Policy, you will be returned to the home screen/browser.
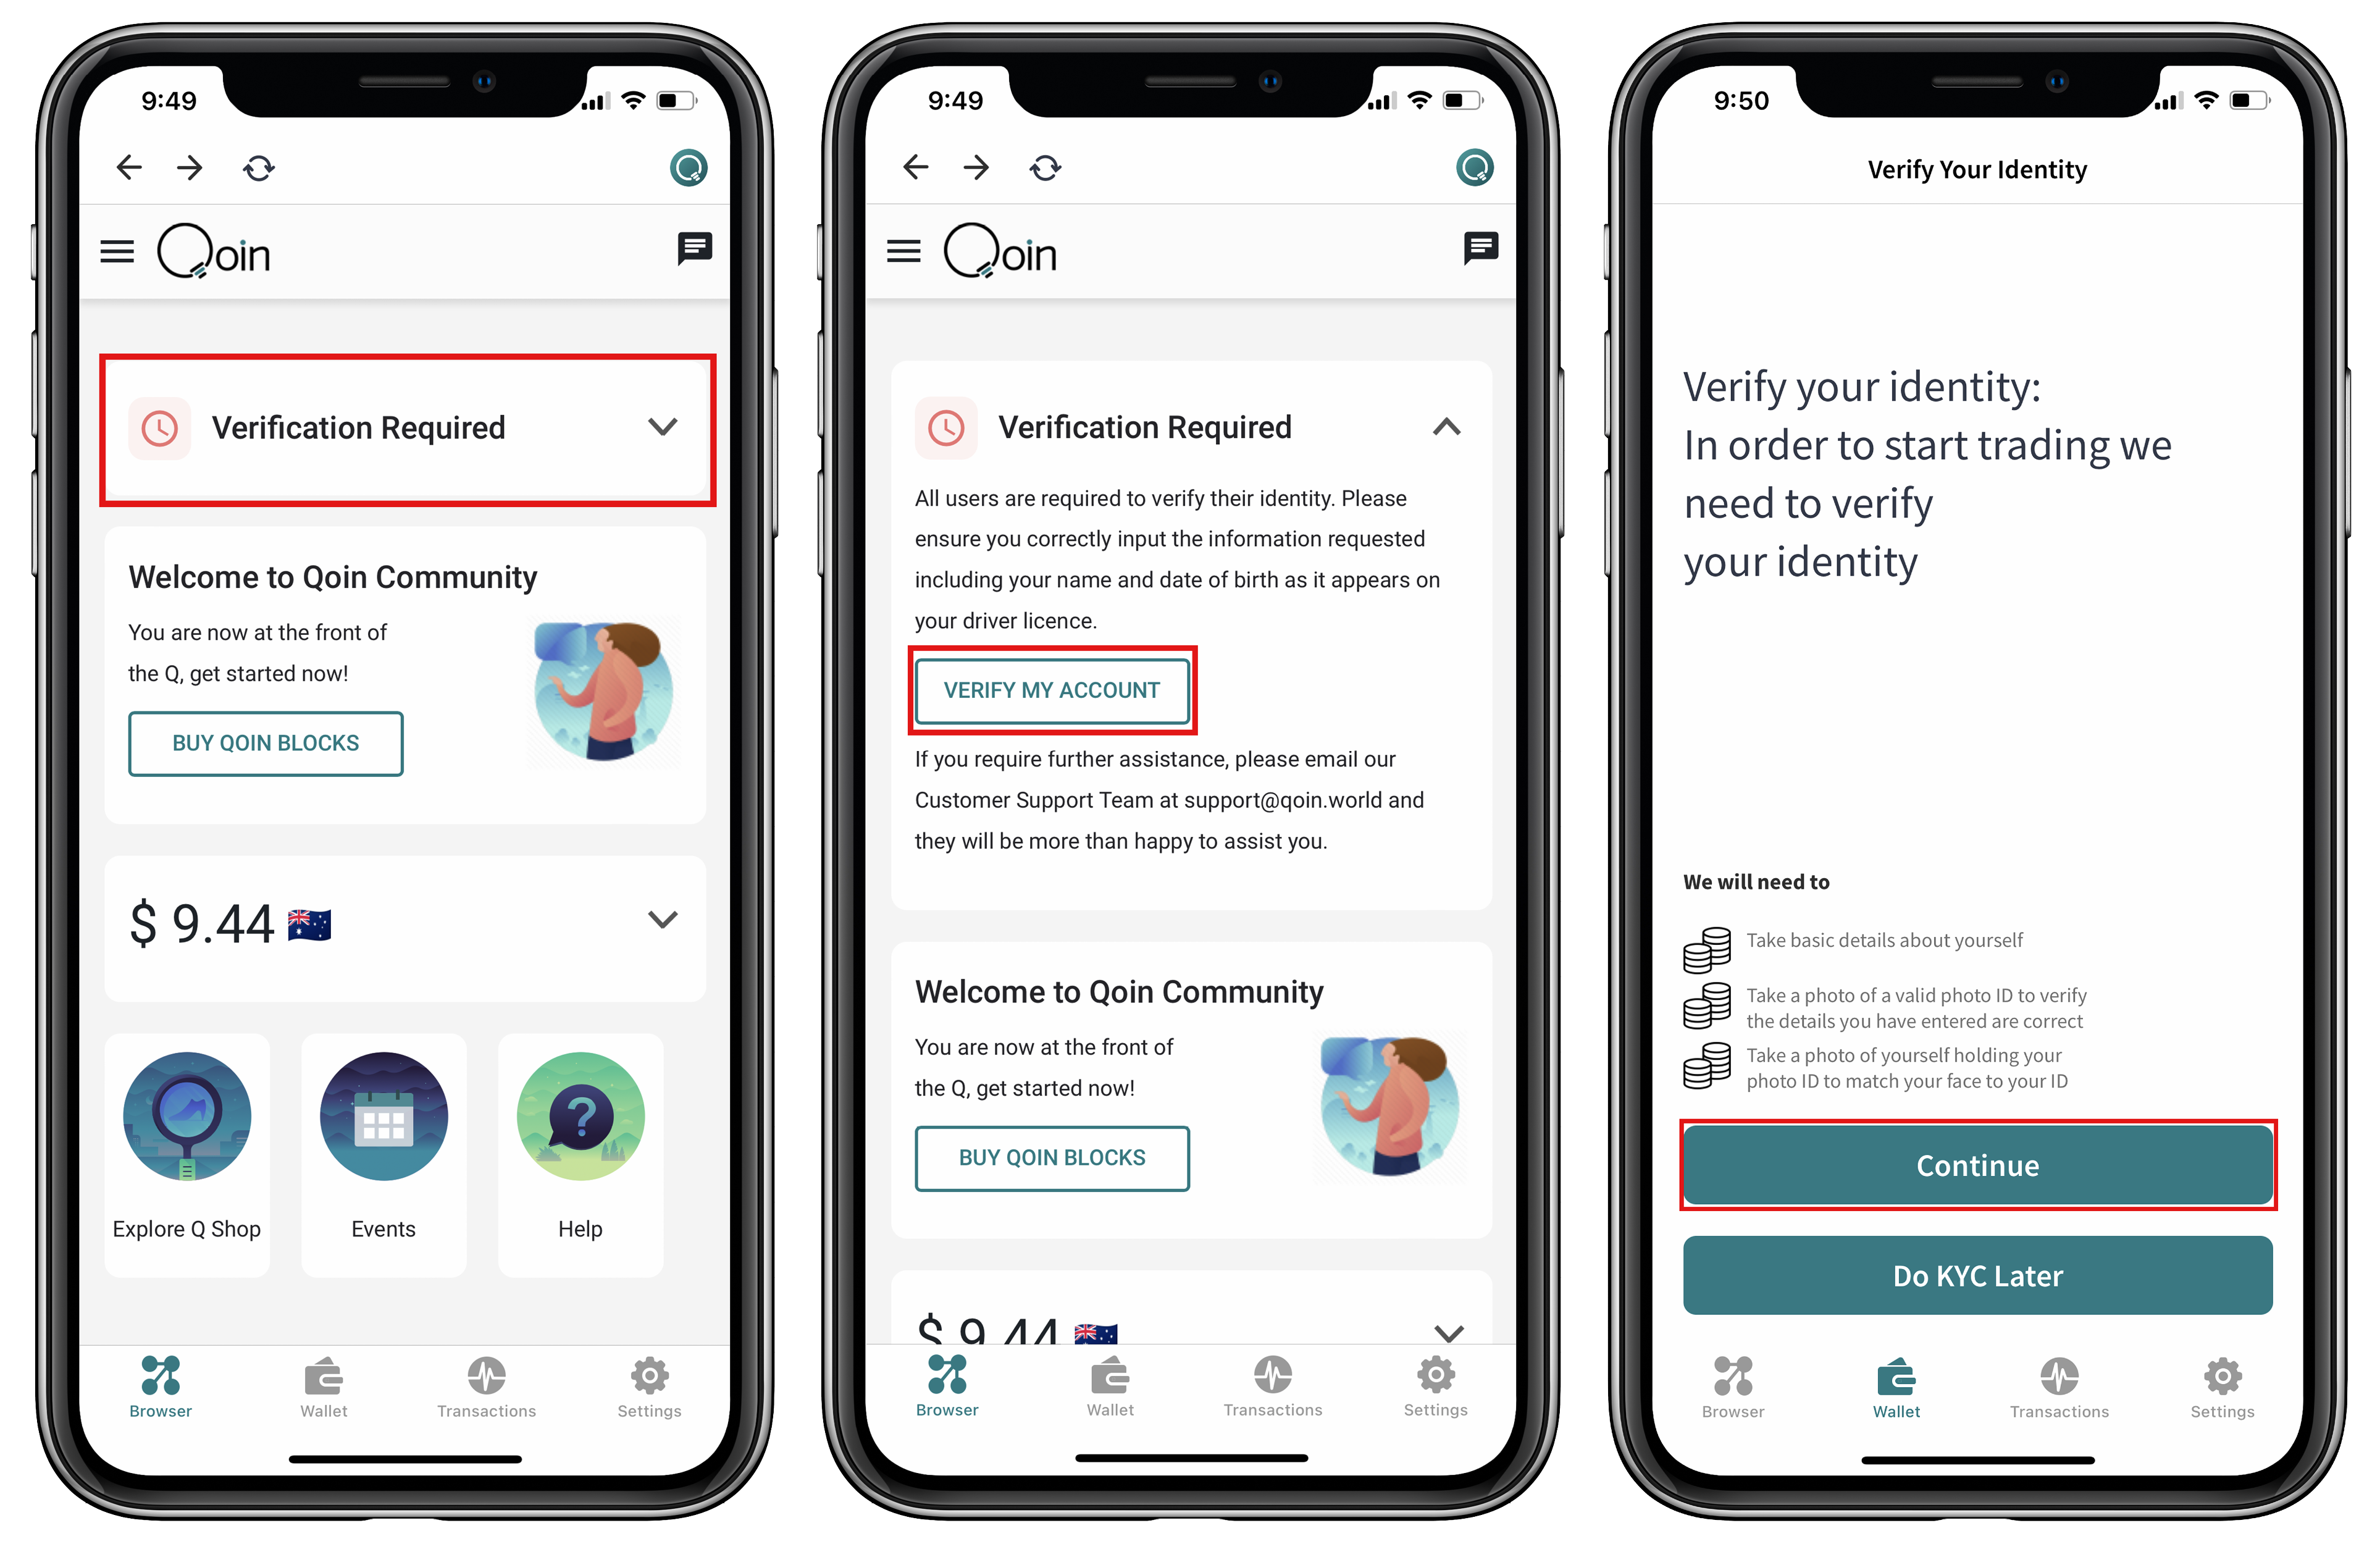
To begin the KYC Process:
1. Click to select ‘Verification Required’ to begin KYC
2. Select ‘Verify My Account’
3. Verify Your Identity:
– Select ‘Continue’
Know Your Customer (KYC): About You
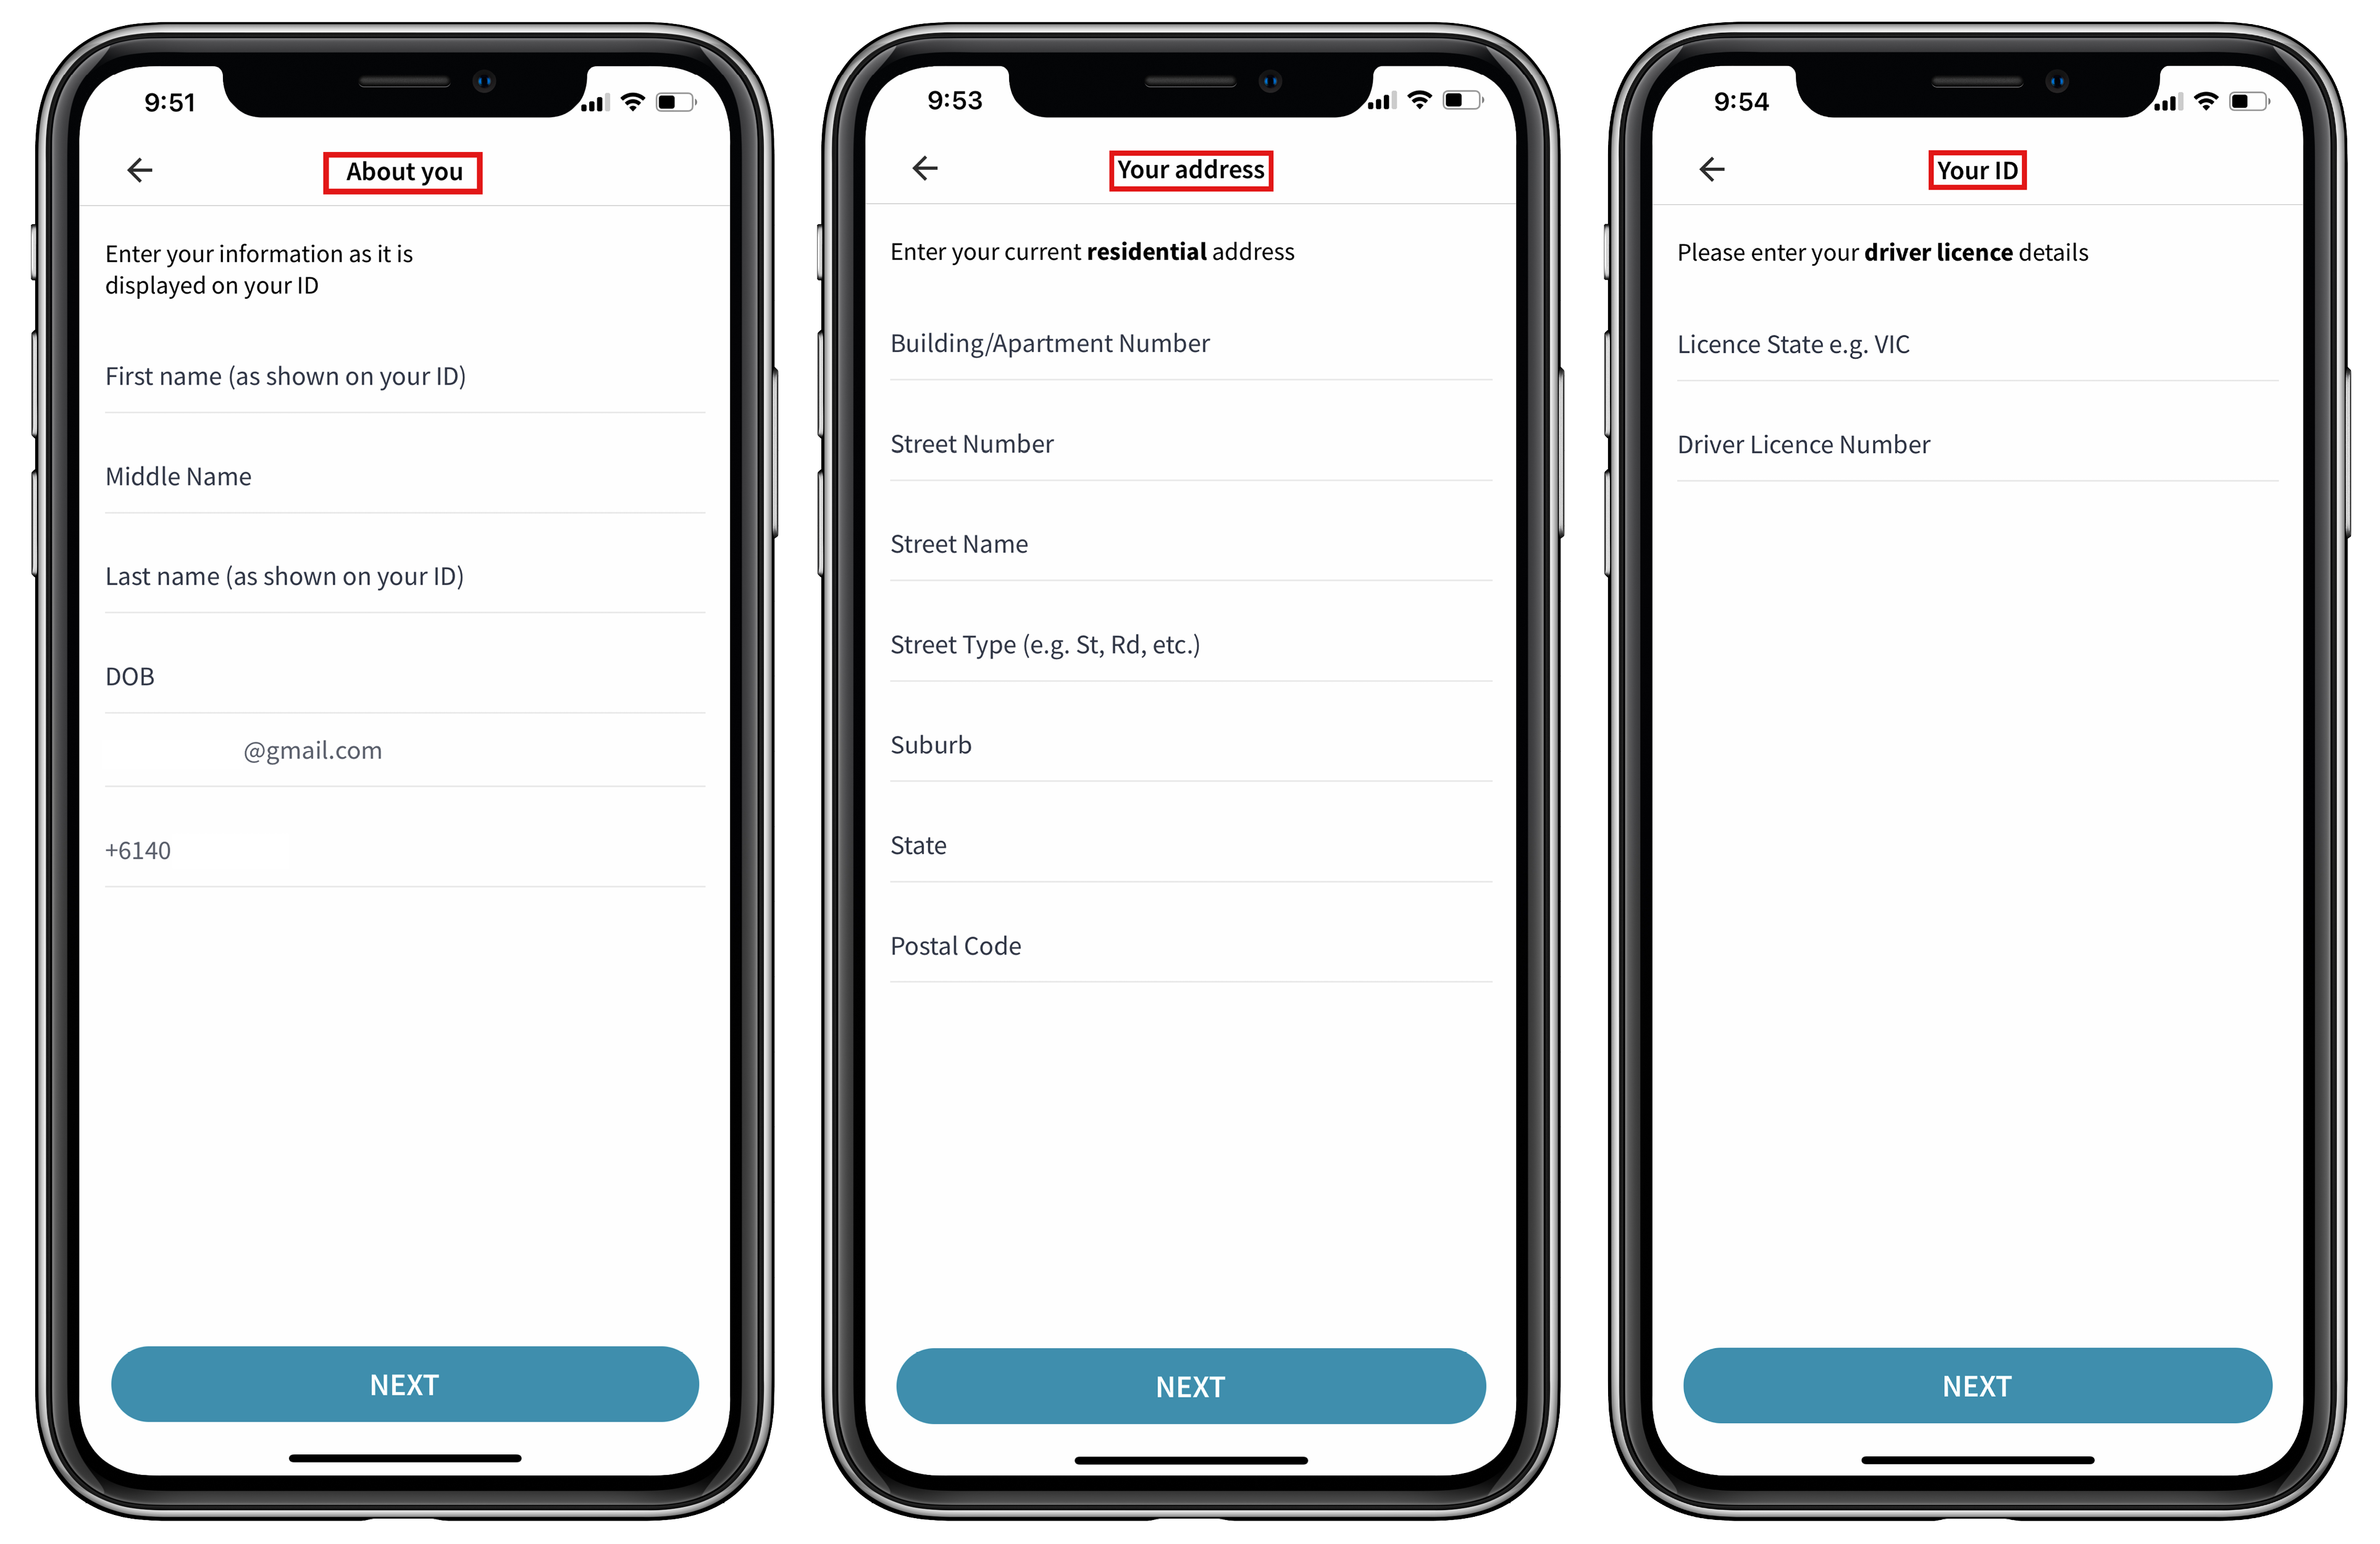
You are required to complete information about you, your address, and your ID.
• The information entered must be the same as it is displayed on your ID.
1. On the ‘About You’ screen you will be required to complete the following information:
– First Name (as shown on your ID)
– Middle Name
– Last Name (as shown on your ID) – Date of Birth
2. On the ‘Your Address’ screen you will be required to complete all details for your current residential address.
3. On the ‘Your ID’ screen you need to enter your Driver’s Licence details:
– Licence State, E.g., VIC
– Driver’s Licence Number
Know Your Customer (KYC): Proof of your Identity
Next, you will need to complete information that will help confirm your identity.
1. Select ‘Begin Verifying’
2. Select the Country where your ID is from
3. Upload a photo ID: Select the ID you will be using to verify your identity
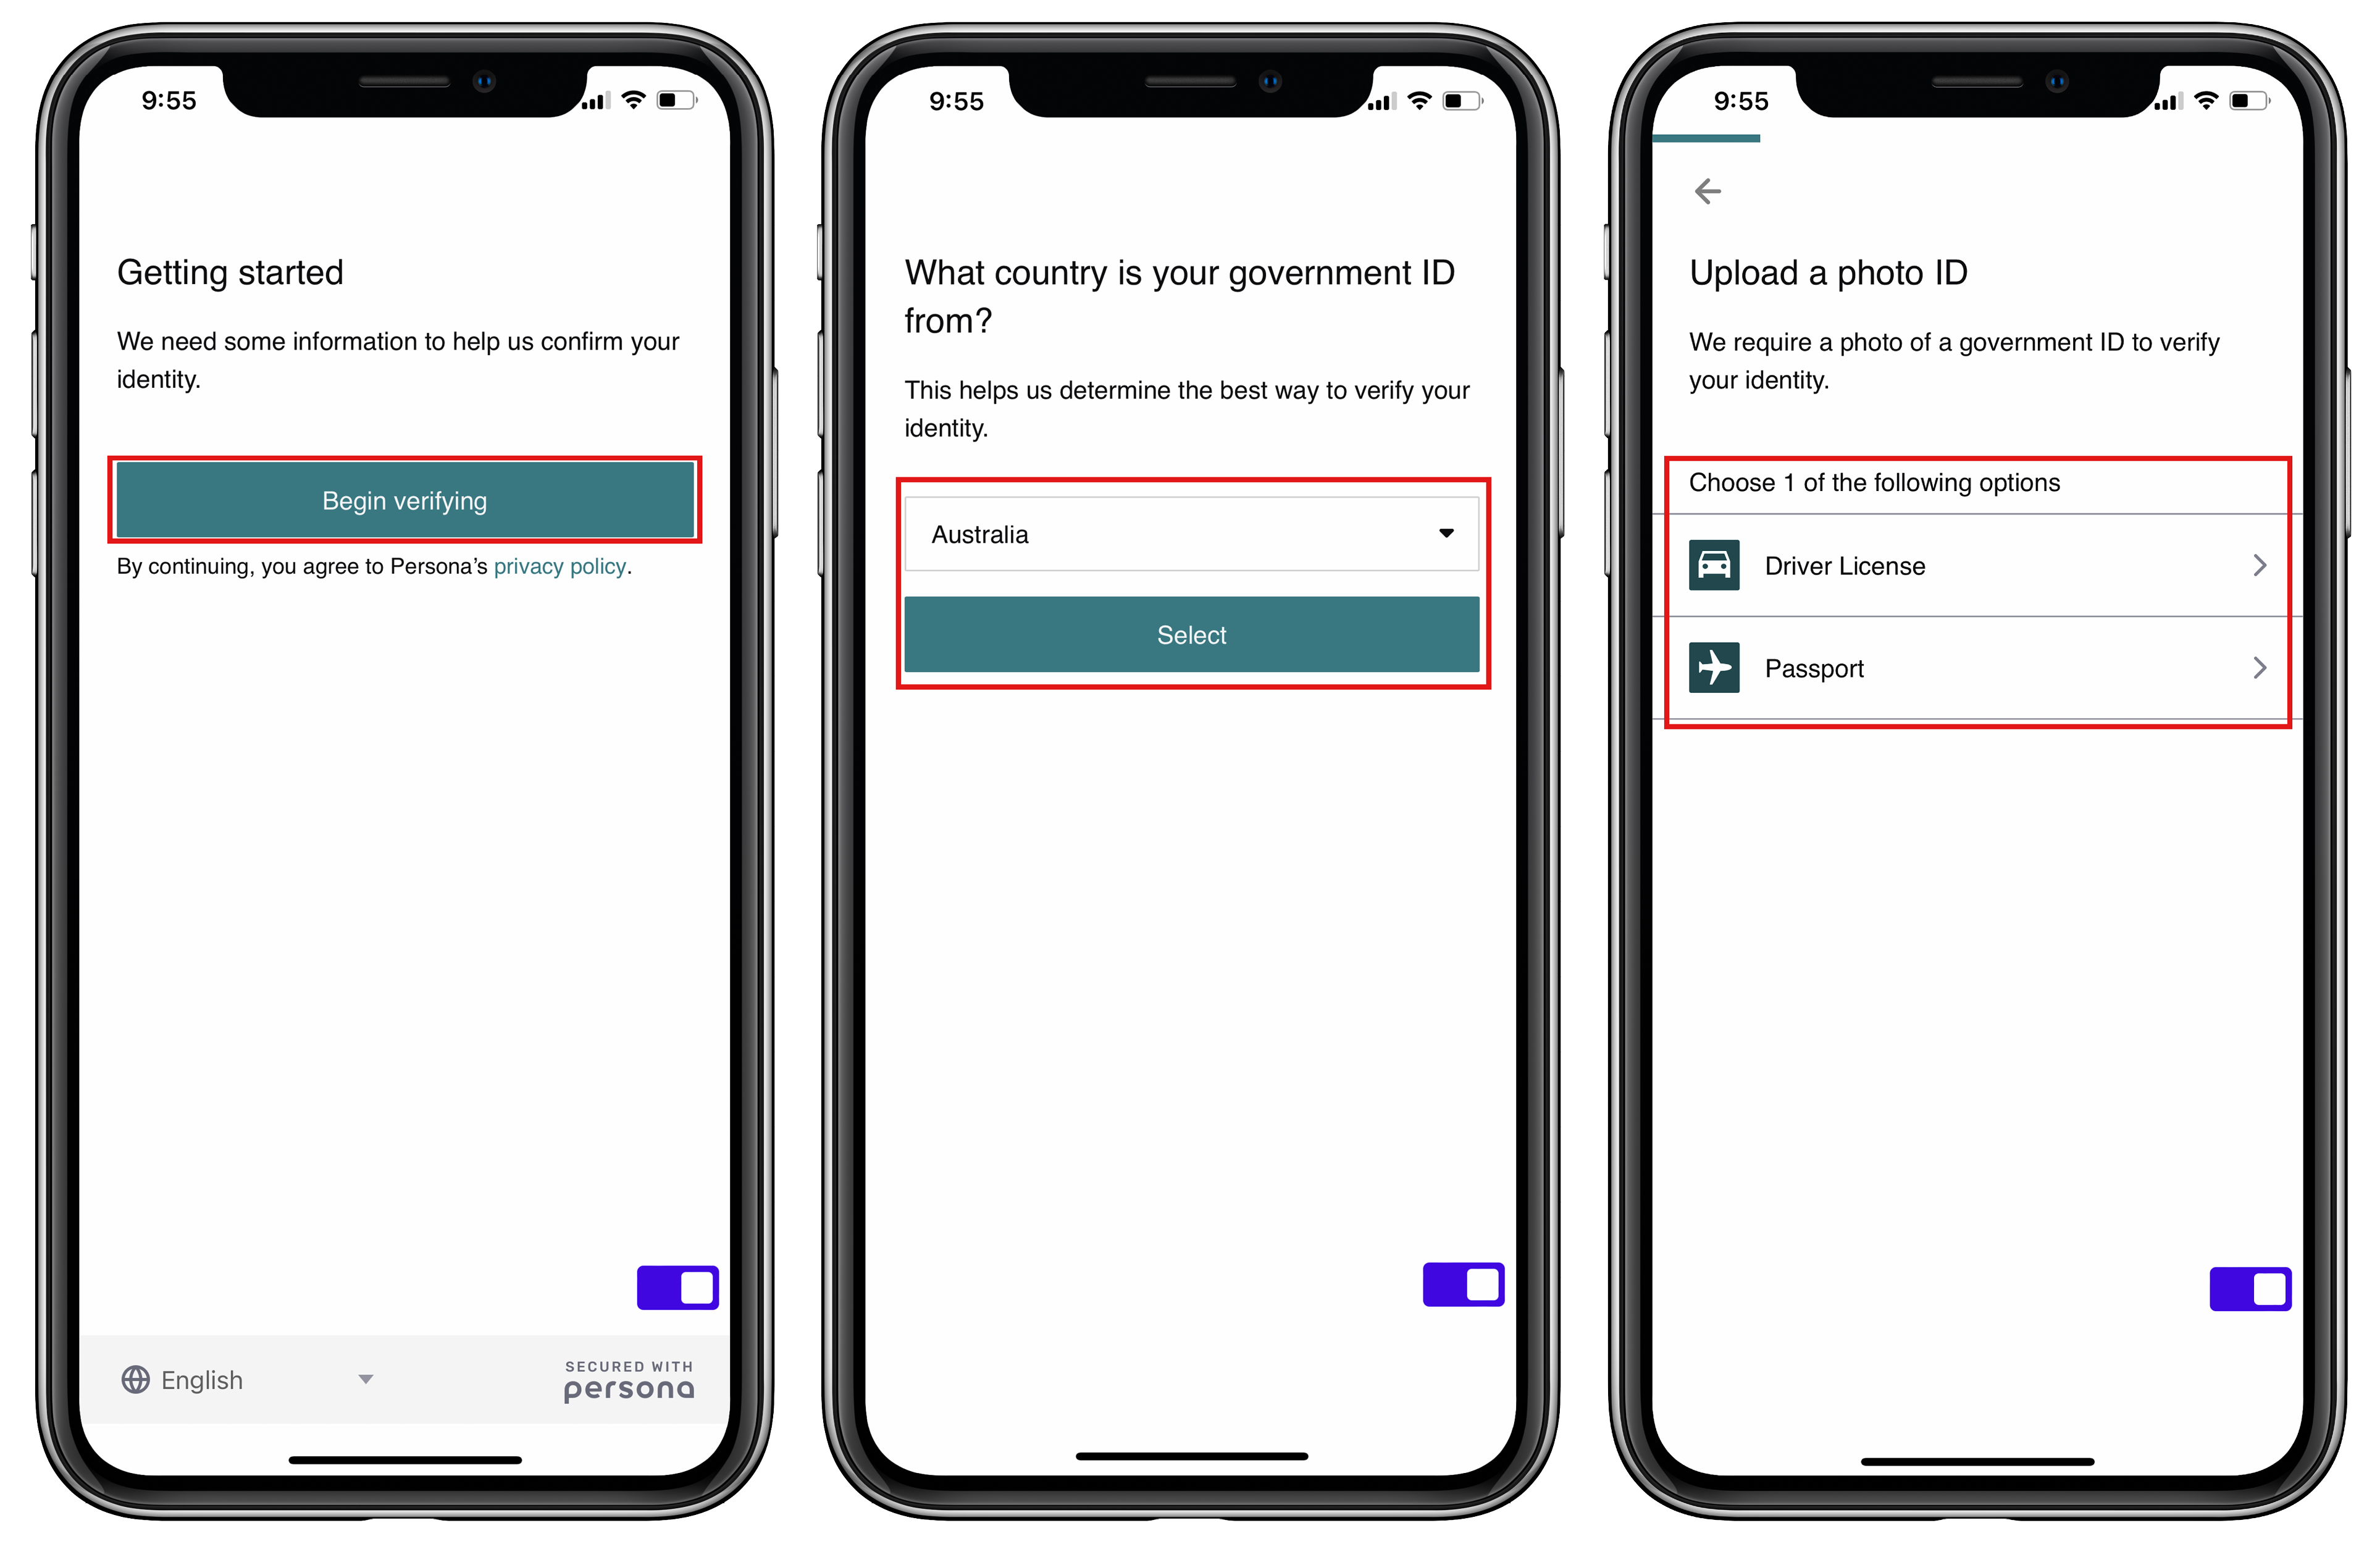
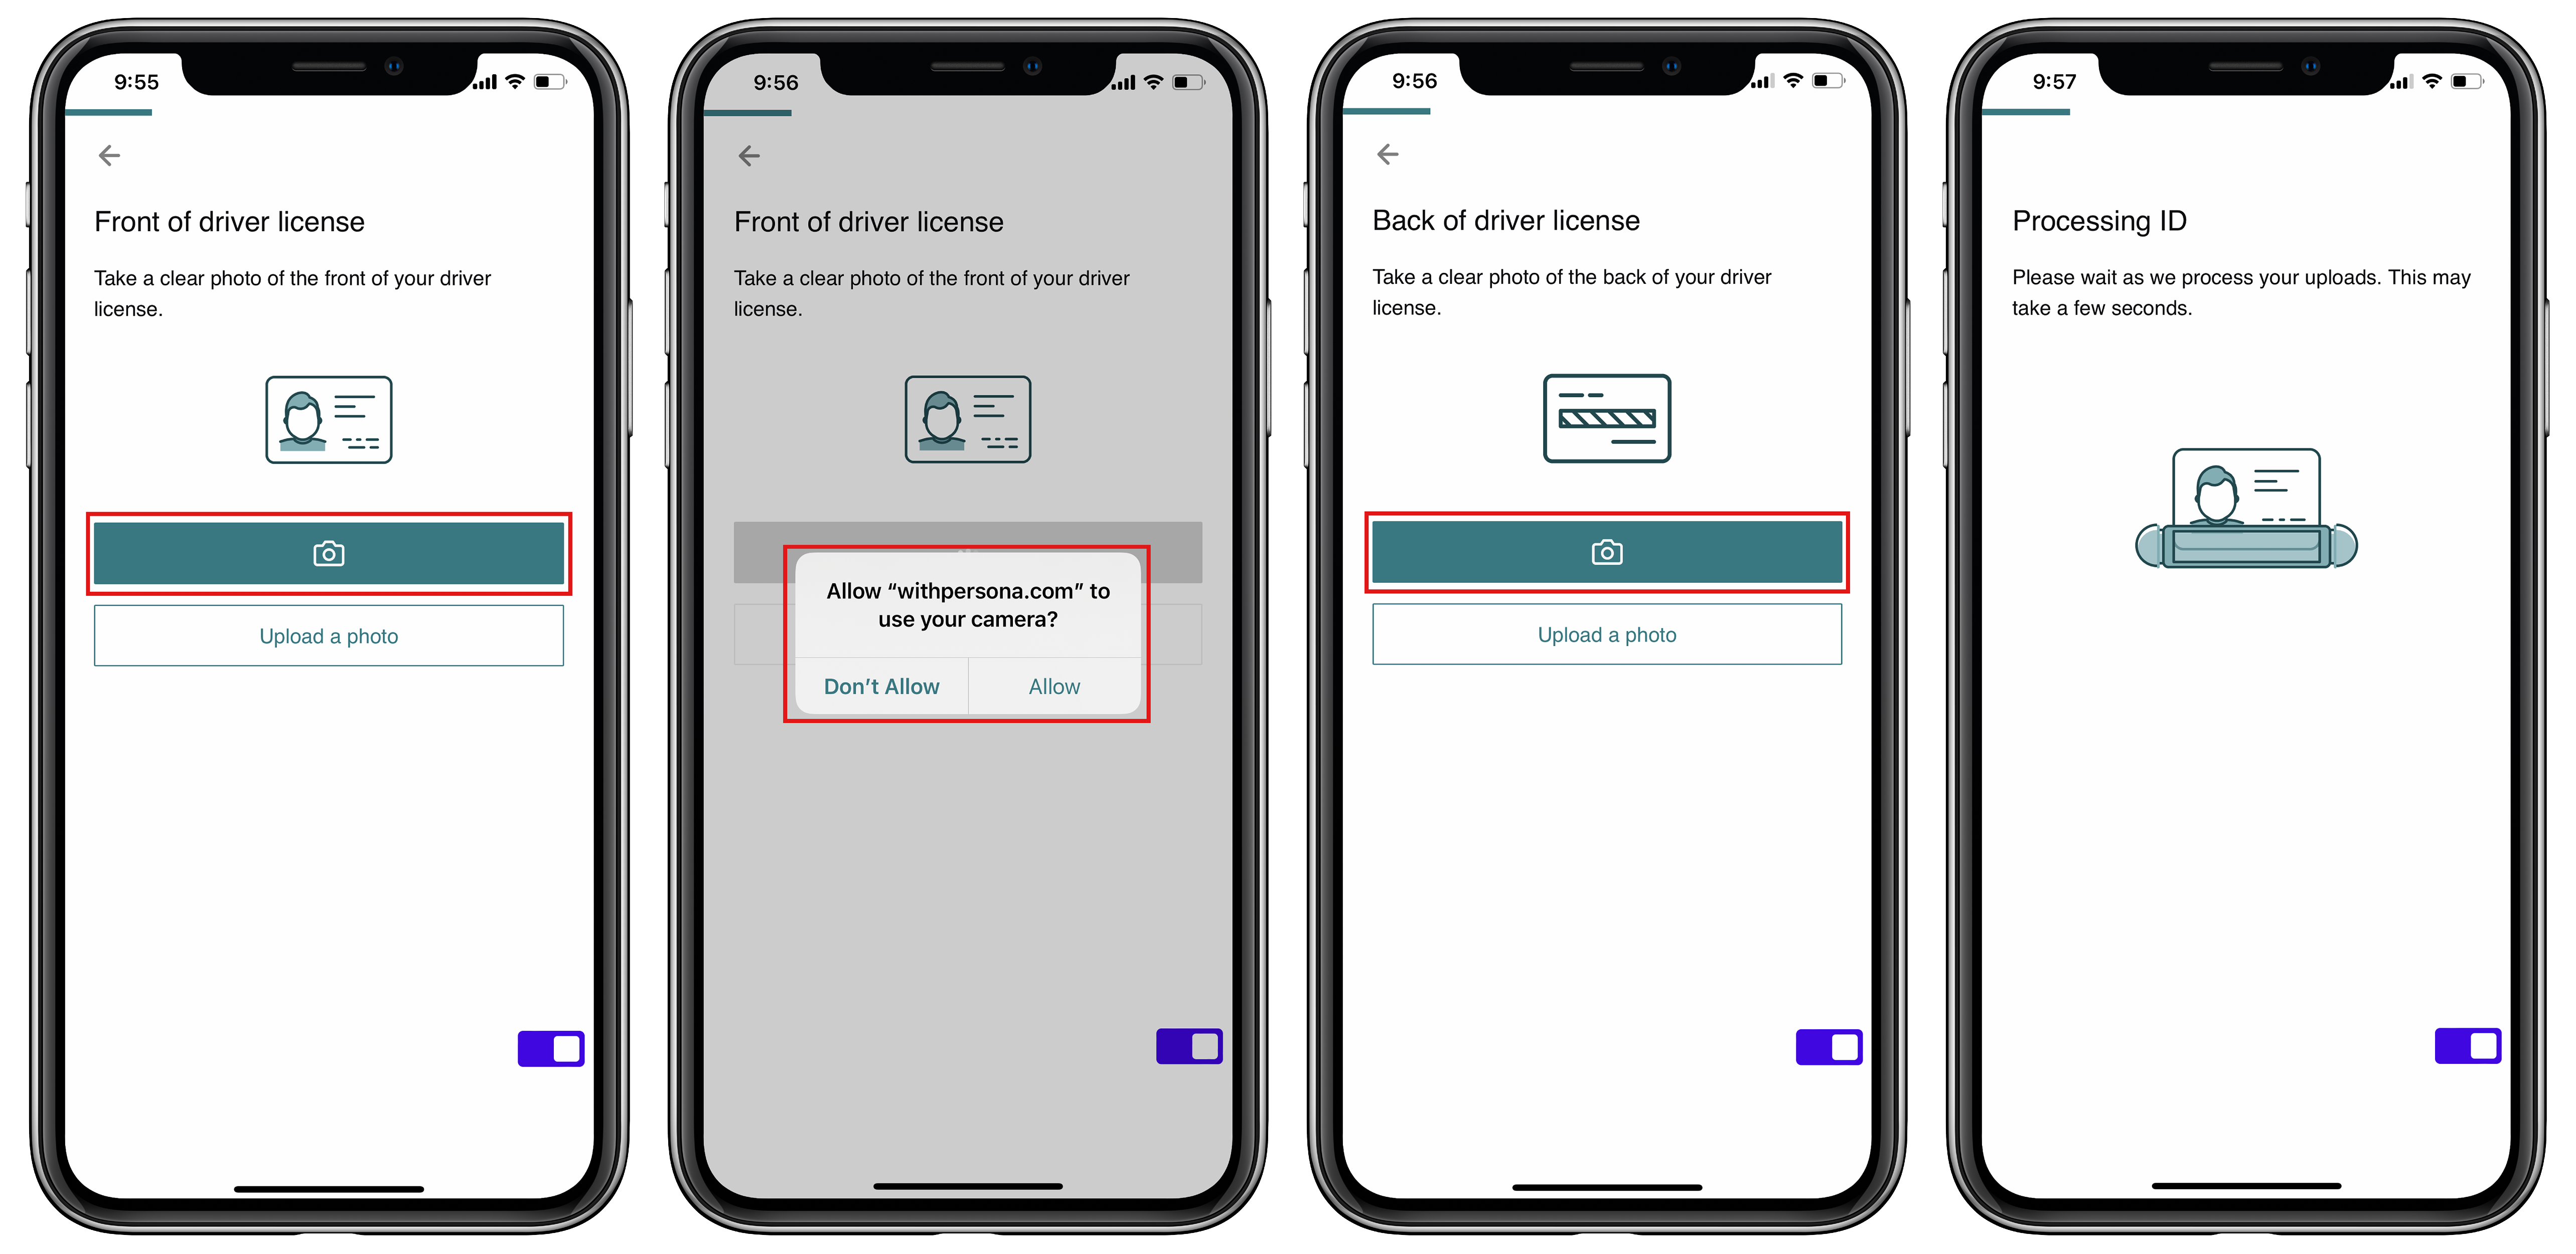
The example below uses An AU Driver’s Licence to verify the person’s identity.
1. First, take a photo of the ‘front of driver’s licence’
– Have your driver’s licence ready and select the camera icon to take the photo or if you have already taken a photo select the ‘Upload a photo’ option
2. You will be required to allow access to the camera
3. Next take a photo of the ‘back of driver’s licence’
– Select the camera icon to take the photo or if you have already taken a photo, select the ‘Upload a photo’ option
4. Your ID uploads will now be processed.
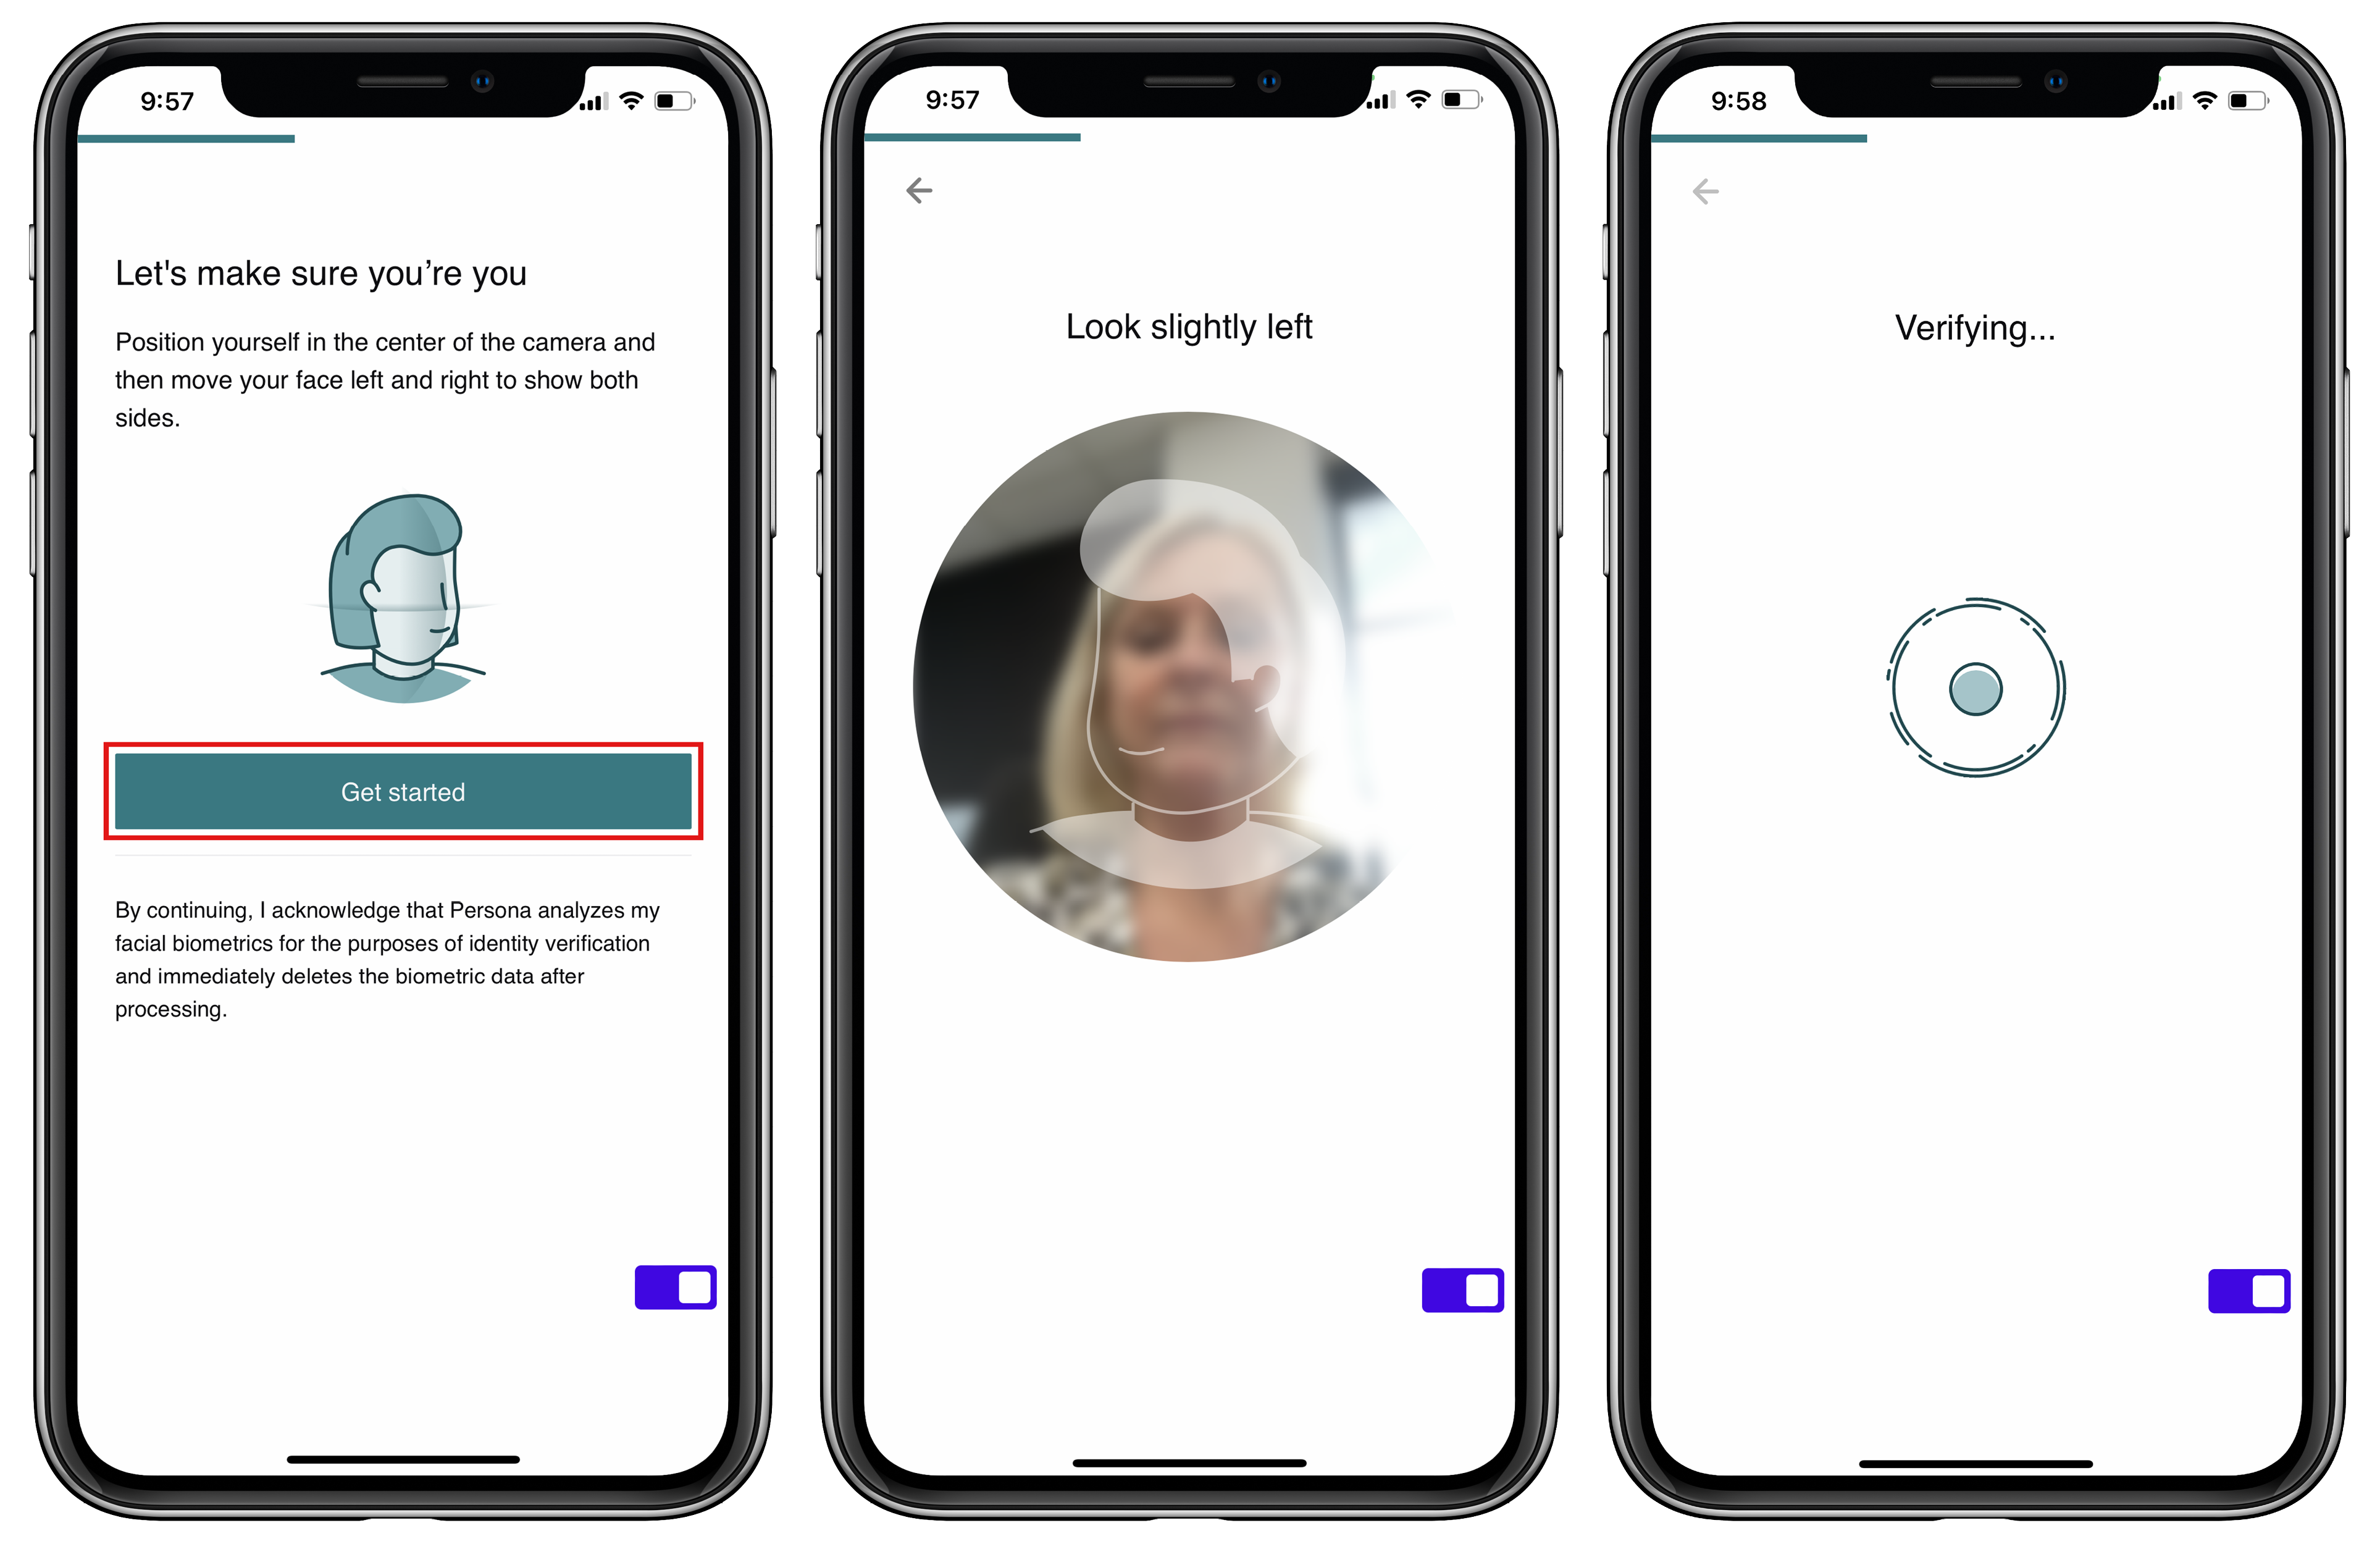
Know Your Customer (KYC): Biometric ‘Selfie’ Facial Image
In the next step you will be required to take ‘live’ photos of yourself
1. Select ‘Get Started.
2. Align your face with the grid then follow the prompts, E.g., ‘Look slightly left’.
3. Once your photo has successfully been taken verification will occur.
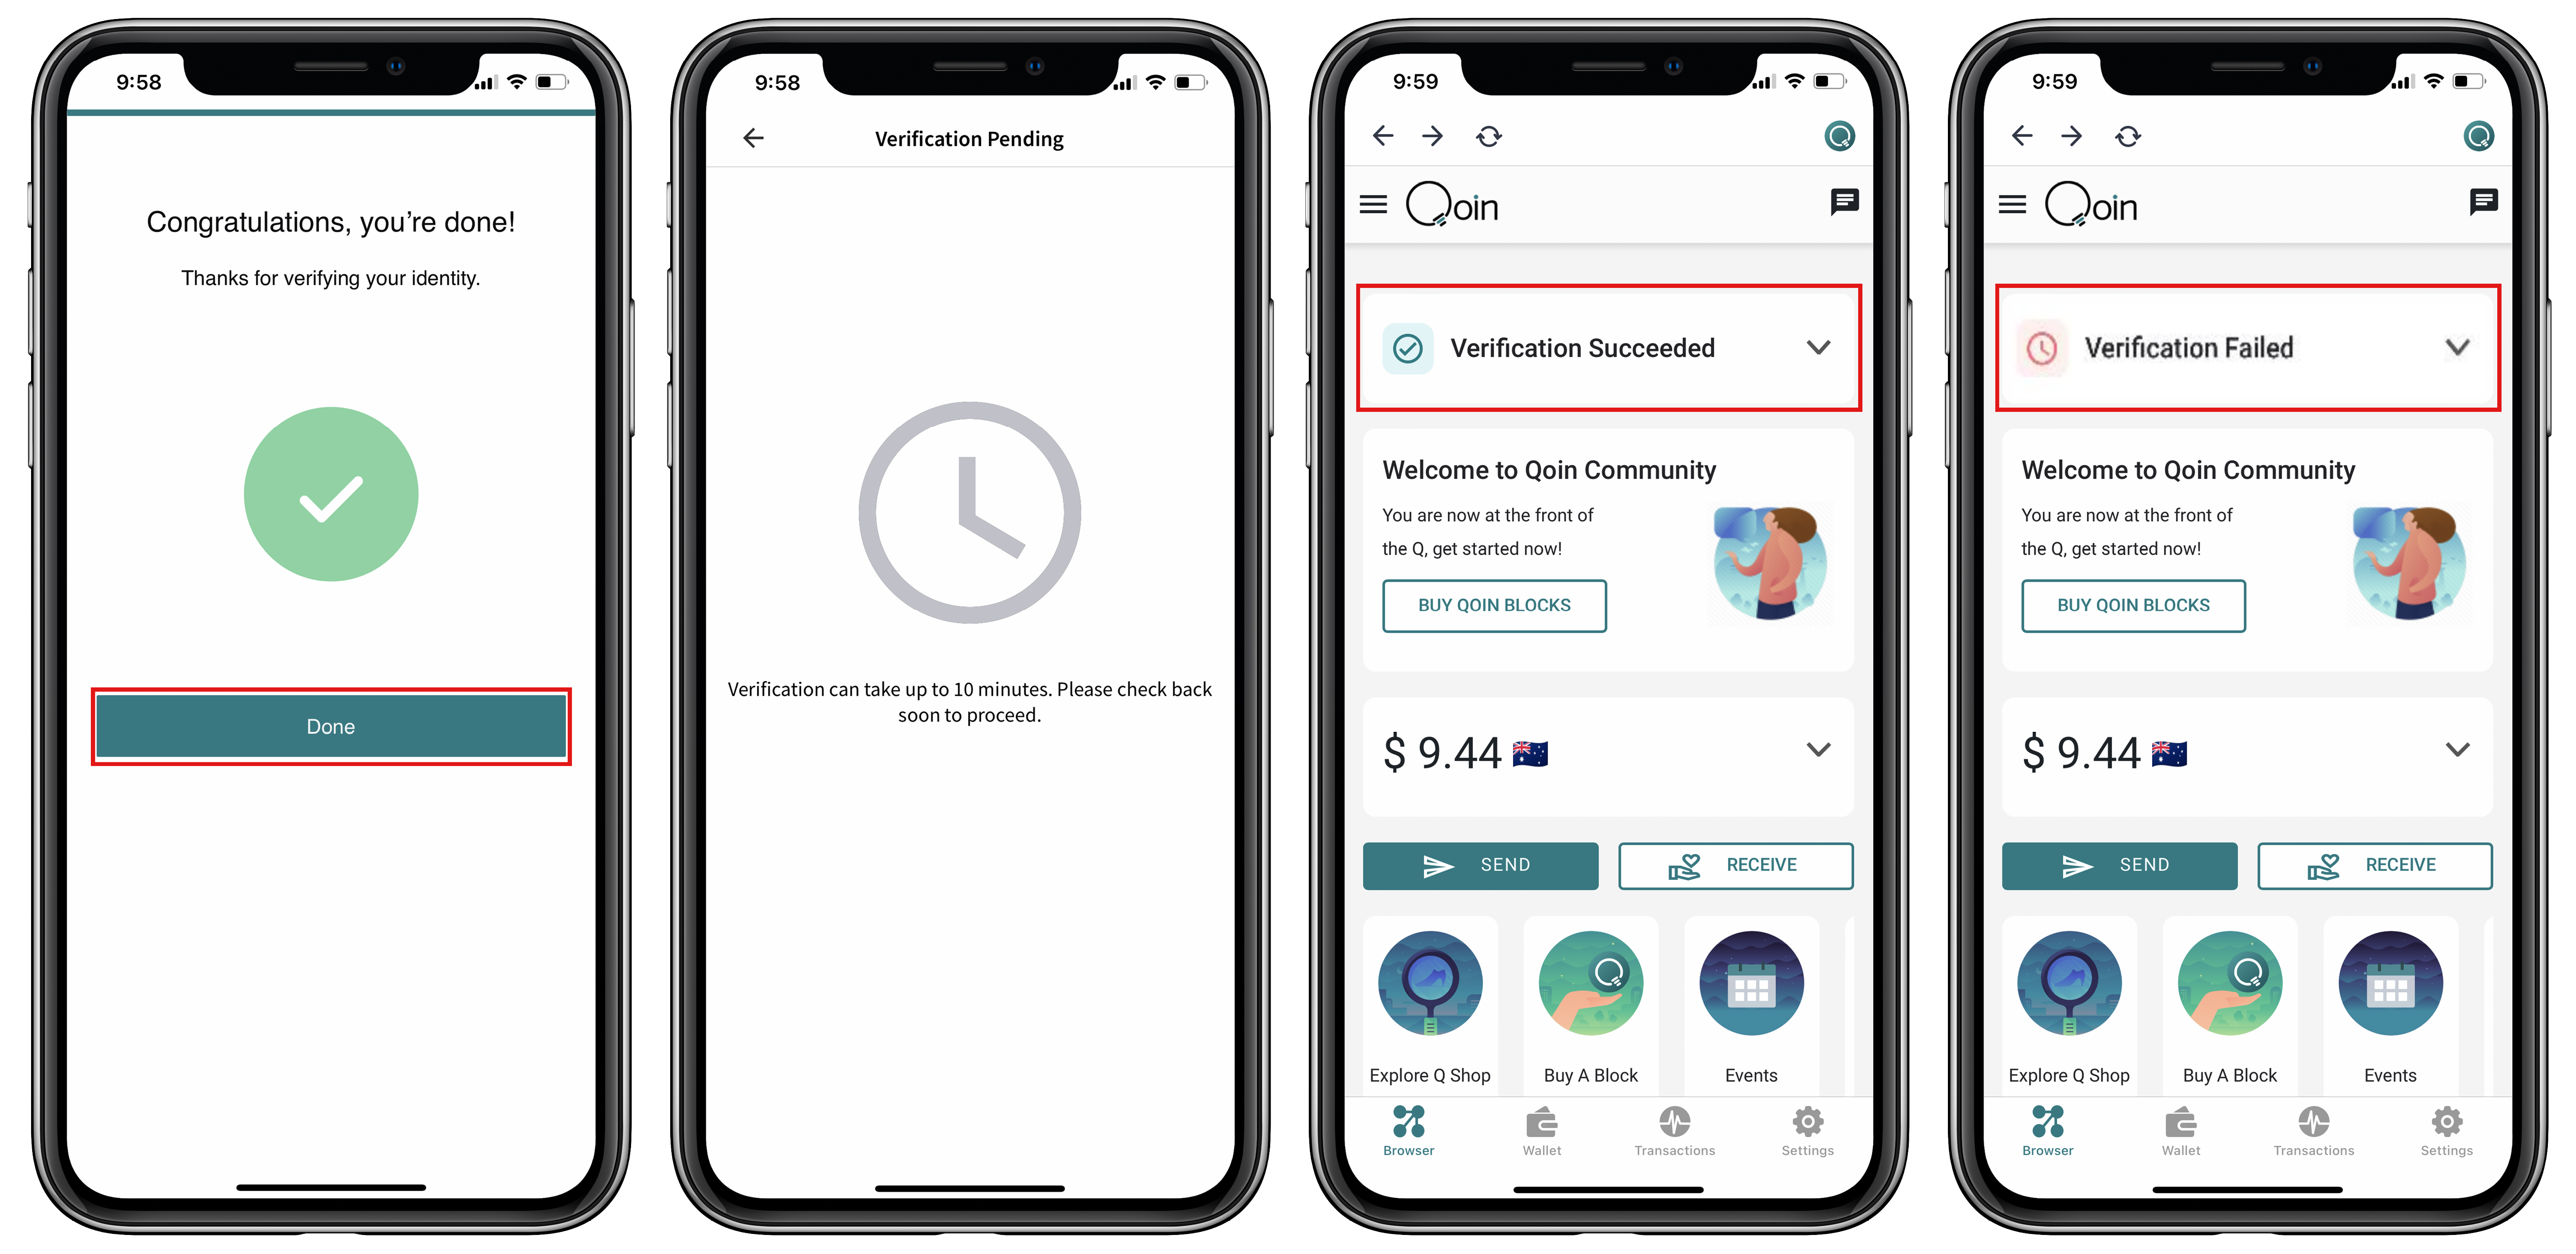
1. You’ll received confirmation that you have completed verifying your identity.
– Click to select ‘Done’.
2. This screen will advise verification is pending and may take up to 10 minutes to process.
– Click the ‘back arrow’ to return to the Home Screen/Browser.
3. Once the verification is completed this will display on your Home Screen/Browser.
4. If KYC doesn’t work, you receive notification that “Verification Failed’. If this happens you need to contact the verification team via the email relevant to your country, as below:
– [email protected] / [email protected] / [email protected]
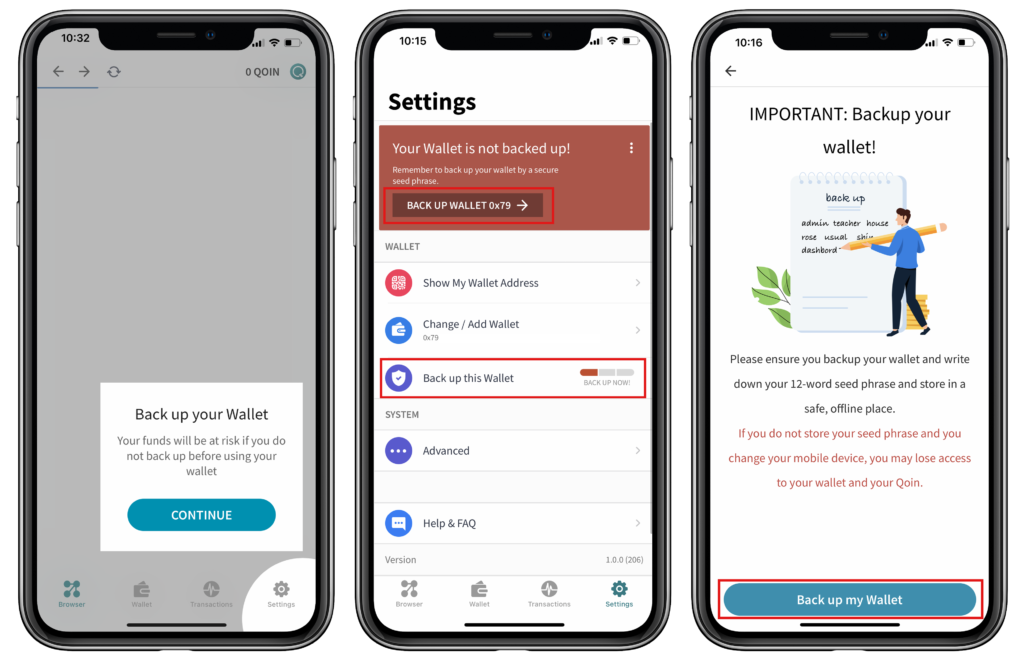
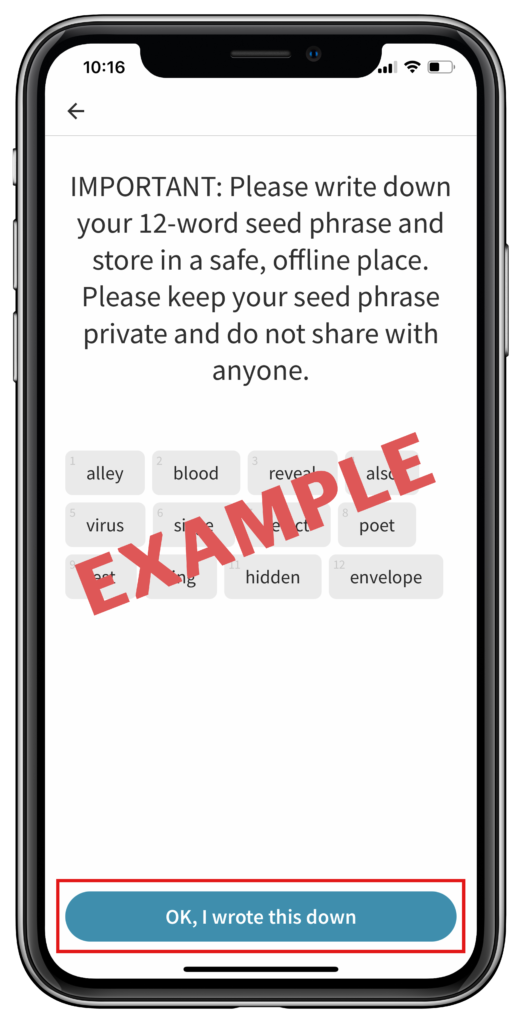
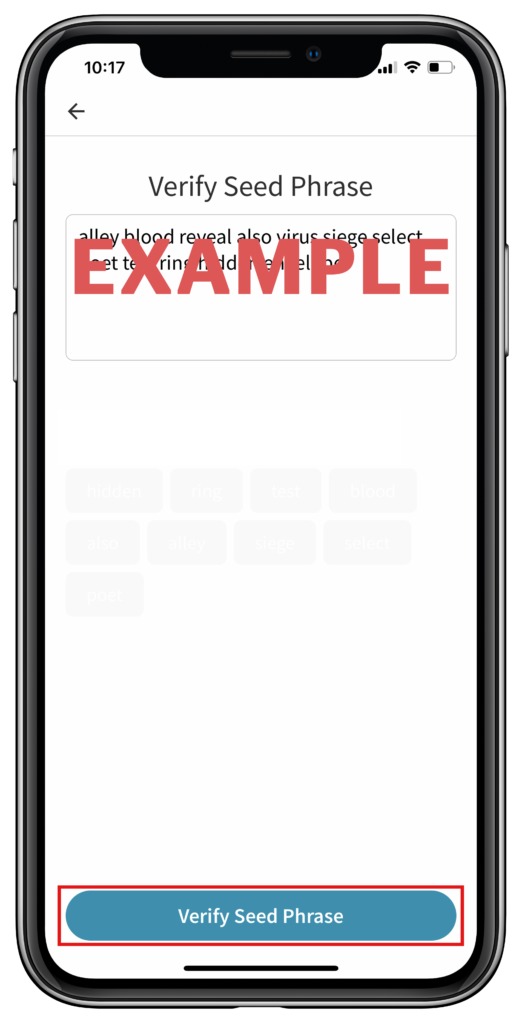
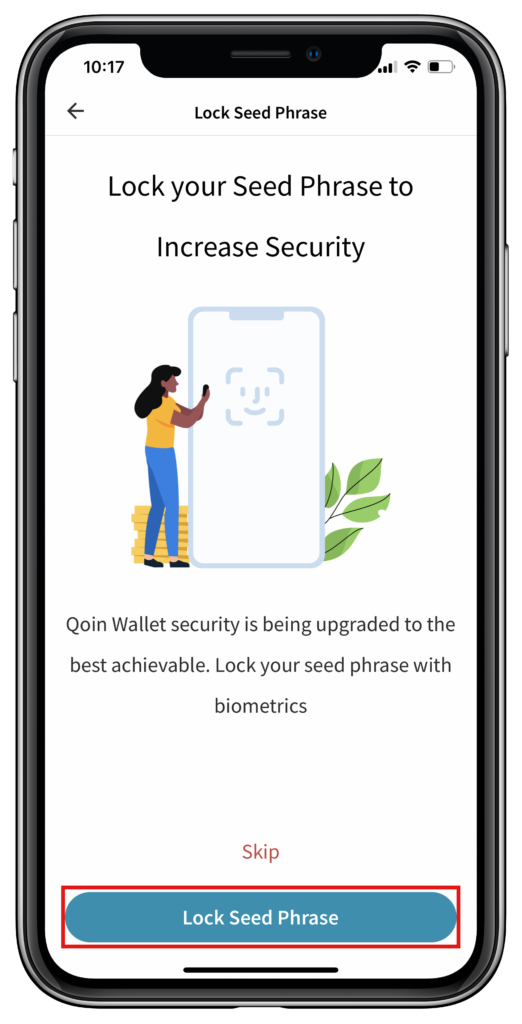
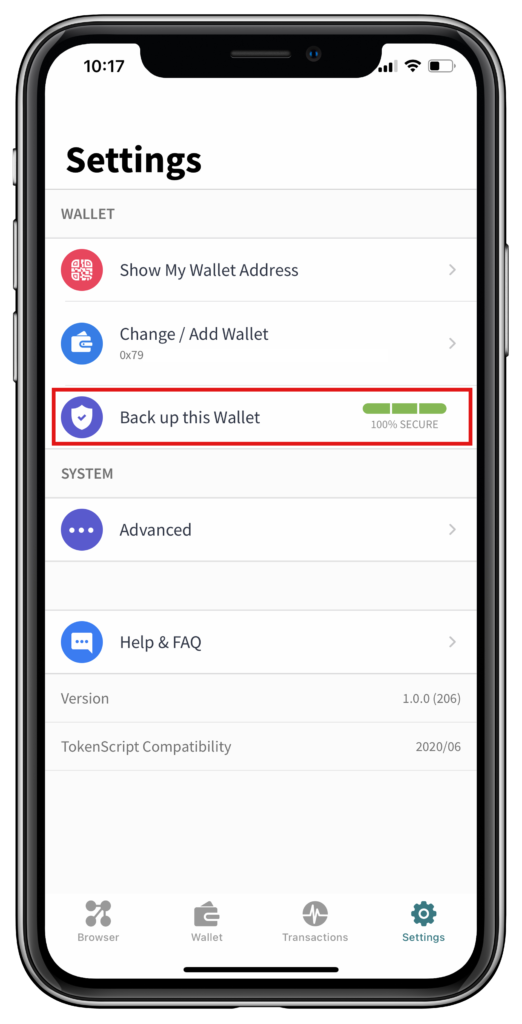
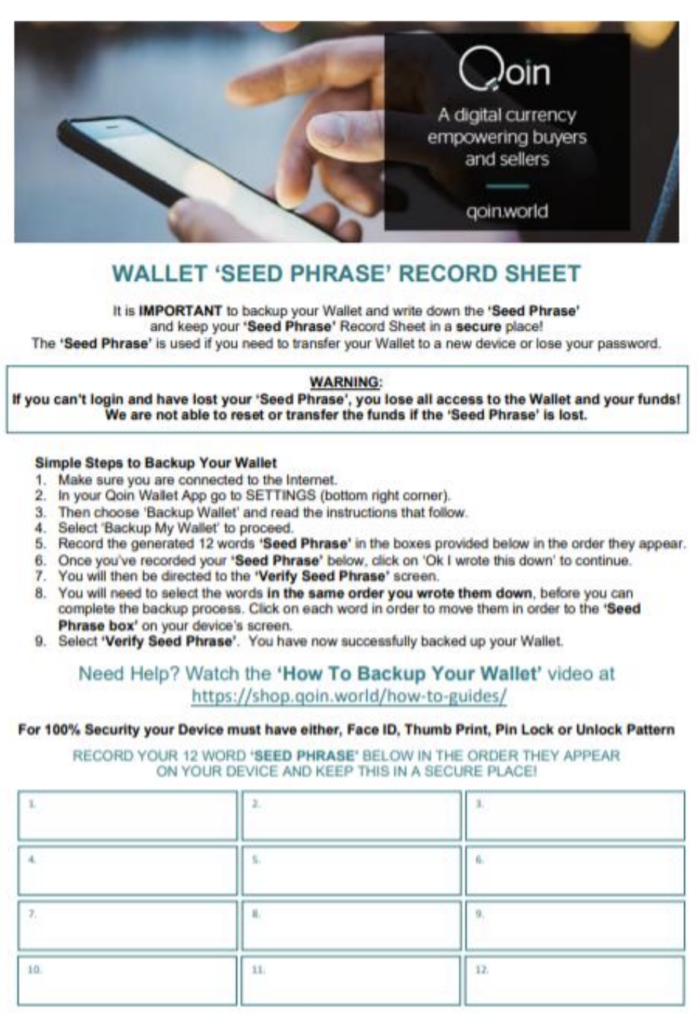
Step 3: Create a Wallet, Back it up & Record the Seed Phrase
Step 4 – Merchant Registration & Know Your Business (KYB)
Merchant Registration
Only new merchants who are presented to by an accredited Qoin Agent will be eligible to receive funding of Qoin to the value of $250 (AU/NZ) or £100 (UK) (value determined at time of payment). To receive your Qoin to the value of $250 (AU/NZ) or £100 (UK) (Reward Qoin) you must have also completed your Merchant Registration, Business Details and Business Listing.
1. On your mobile phone, start by opening your Qoin Wallet and navigate to the “Browser” tab. This will take you to the home page.
• To begin the registration process, select the ‘Merchant Register’ button
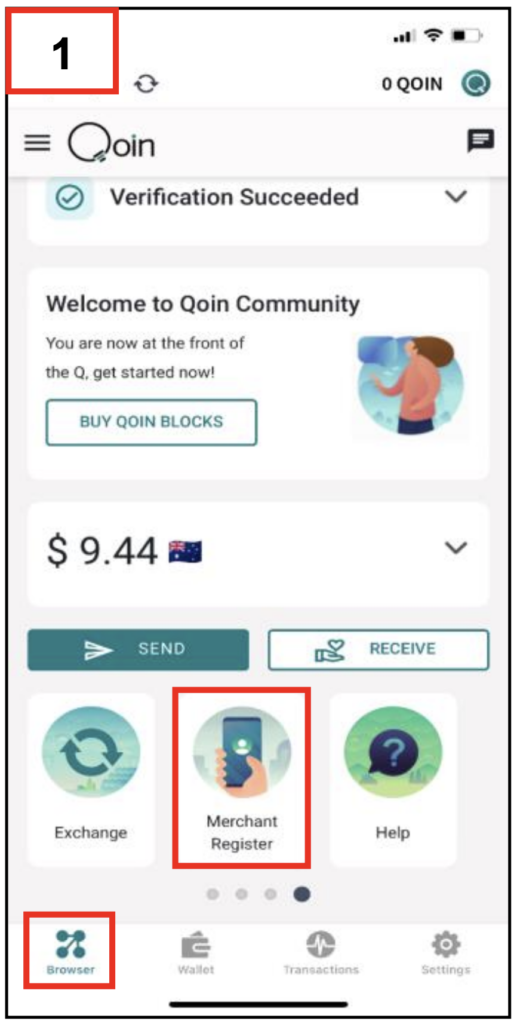
2. When the ‘Business Details’ screen opens, you need to complete the following information:
• Enter your Business Registration Number
– E.g., AU = ABN / NZ = NZBN / UK = UK Company Number
• Business Entity Name
• Your Qoin Wallet Address will display automatically
• Estimated Annual Business Turnover $
– (The annual turnover of all Qoin merchants is used in the algorithm to determine the Qoin value, along with other factors including number of merchants)
• Physical Address
– As you type in the address, google maps will match what you type to a location on the google map.
– Once it has provided a correct match you must select that option to align it with the google map
• Business Phone Number
• Referred by: Provide details of the Business Name / Trading Name / Person that referred you to Qoin (for the Qoin to the value of $250 (AU/NZ) or £100 (UK) Introduction payment).
Please Note: Only Merchants who refer new Qoin merchants via an Accredited Agent, and only after that Accredited Agent presents to the new Qoin Merchant, and both new Merchant and referring Merchant achieve stage 5 will a referral incentive of Qoin to the value of $250 (AU/NZ) or £100 (UK) be payable.
• Qoin Agent: Select the Agent from the drop-down list
• Agree to the Terms of Use
• Click ‘Register’ to save when all details are completed
Once your Qoin Registration and Business Details have been completed, you will receive a New Merchant Welcome Email.
Using Qoin Wallet App
ABN, business name, wallet address, turnover, business address and phone number.
Type Referrer Name and Select Agent Name
STEP 5 – DIRECTORY LISTING
Using Qoin Wallet App or https://shop.qoin.world/
Business name, listing description, three photos, hours of operation, address, contact numbers and location.
STEP 6 – QOIN FUNDING
Q Reward Qoin, Packages and Blocks.
STEP 7 – QOIN TRANSACTING
Sending or receiving Qoin as a Qoin Merchant or Consumer.
Want to know how to transact with Qoin? Visit our ‘How to transact’ page here >>

